Feeds:
Posts
Comments

Posts Tagged ‘entertaining’

quick and easy chocolate dessert

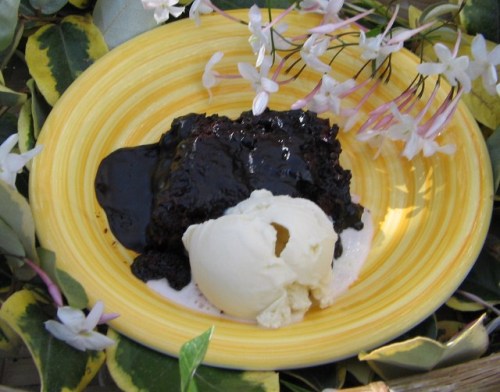
Mom called it Fudge Crud--but it's delicious and festive enough for any dinner party.

When I was a kid, my mother made an easy, inexpensive dessert that was officially known as Hot Fudge Sundae Cake; Mom called it Fudge Crud. It was one of those science-experiment desserts: you made a cake batter (one without eggs), spread it on the bottom of the pan, then topped it with a mixture of cocoa and brown sugar and poured hot water over the whole thing.

And, miraculously, as the cake baked, the water and cocoa thickened into a sauce and the cake rose to the top, becoming a sort of chocolate floating island in a sea of fudge sauce. It never failed to amaze me–as they say, science works even if you don’t believe in it. There was just one little problem: It wasn’t chocolate-y enough. So this winter, when chilly nights made me think fondly of warm gooey desserts, I remembered Fudge Crud.

And I decided to tinker with the amounts of cocoa until it was chocolate-y enough. When I made the most recent version for friends last week, they declared that I had achieved my goal.

Hot Fudge Sundae Cake

Cake
1 cup flour
3/4 cup granulated sugar
4 tablespoons cocoa (good cocoa – I use Valrhona)
2 teaspoons baking powder
1/2 teaspoon salt
1/2 cup milk or water
2 tablespoons vegetable oil
1 teaspoon vanilla
1 cup chopped walnuts or pecans

Sauce
1 cup packed brown sugar
1/2 cup cocoa
1 3/4 cups hot water

Heat the oven to 350 degrees. Mix together the first five ingredients, then stir in the milk or water, the oil and the vanilla. Stir until smooth, then mix in the nuts. Spread the batter in a baking pan.

Yes. Now, about that baking pan. The original recipe claims that you can make this dessert in a 9x9x2 square pan. And you can–but you will have chocolate goo all over the bottom of your oven if you do. I use a lovely 9x10x3 Le Crueset baking dish I received as a gift a few years ago. It’s perfect. If your friends don’t know you well enough to give you lovely deep baking dishes, try a 9×11 pan.

Anyway, you spread the batter in the pan. Mix together the half-cup of cocoa and the brown sugar and sprinkle it over the batter, then slowly pour the hot water over all. Bake for 40 minutes, until the cake floats to the top and firms up.

Spoon the warm cake into dessert bowls, making sure everybody gets plenty of sauce, then top with ice cream. Yum.

Laurie

Read Full Post »

I make lasagna for parties and potlucks; I often make it for the first night of our annual girlfriends four-day Cambria road trip, but I’m fairly sure my honey has never had it for a dinner with just the two of us. Mostly because, in true Perry fashion, I only know how to make a batch for 10 or more guests. I’m sure you can make smaller amounts, but why? The leftovers are even better for lunch or dinner the next day and the rest freezes perfectly for that night you are just too exhausted to prepare dinner. So here you go – dinner for 10 – just add salad and garlic bread.
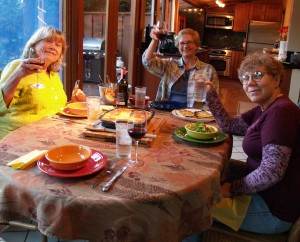
Good friends, a bottle of red & Red & White Lasagna


This lasagna uses both a red sauce and a faux bechamel/white sauce–it’s not a true bechamel because I don’t adorn an onion with whole cloves and steep it in hot milk for an hour. (That makes for a delicious sauce, yes, but I have a day job. And a life.)

Easy Red Sauce

1/2 small onion, chopped
1-2 tbls olive oil
4 large garlic cloves, minced
2 lg cans Italian stewed tomatoes (try to find Italian, they’re better!)
1/2 cup red wine (good wine, follow my mantra – if you can’t drink it, don’t cook with it)
1 small can tomato paste
2 tsp Trader Joe’s 21-Seasoning Salute*
2 tsp Trader Joe’s Pasta Seasoning Blend
Salt and pepper to taste

Heat the olive oil in a large skillet; warm the olive oil (you want medium heat–olive oil burns if your heat is too high), then add onions and sauté until tender (about 3 minutes). Pour in the tomatoes and smash them until they’re in smaller chunks. Add tomato paste, spices and red wine. Simmer with a screen cover (so it doesn’t splatter all over your stove) for about half an hour. Salt and pepper to taste.

Easy White Sauce

1/4 cup butter (half a stick)
1/3 cup flour
1 qt half and half
1 tbls Knorr Caldo de Pollo powder
1/4 cup white wine
1 1/2 teaspoons nutmeg (or to taste; sometimes I use more)

Melt butter in large saucepan until bubbly. Add flour and stir in; the flour should be absorbed. Stir for about 3 minutes; don’t allow to turn brown! Add wine and then the milk until the mixture is thick and starts to bubble (it might not take the full quart). Then add in the pollo de caldo powder. Last, turn off heat and stir in nutmeg.

Hazel’s Red-and-White Lasagna

Ingredients:
Red and white sauces (purchased red is ok if you have a favorite, although I prefer my own)
1 package of Trader Joe’s Quattro Formagio cheese mix
1 8-ounce package of sliced white mushrooms
1 small onion, halved and thin sliced
1 package TJ’s Italian sausage (Chicken)
Olive oil
1 package no-boil lasagna noodles
1 tub Ricotta

Bring a large sauté pan to heat and splash in a couple tablespoons olive oil. Squeeze the chicken sausage from its casings and crumble into the pan. Sauté til cooked through, crumbling into big chunks. Remove from pan and add the sliced onions and mushrooms. Sauté til golden, then remove from heat.

In a large deep lasagna baking pan splash the bottom with olive oil, and smear over the bottom and sides of pan. Ladle in approx 1 cup of your red sauce and add the first layer of dry, uncooked lasagna noodles. Add another cup of red sauce to the top and spread roughly with flat wooden spoon. Sprinkle half your sausage over that layer. Add half the mascarpone by teaspoonfuls across this layer and then add about a cup of the cheese mix. Add another layer of noodles, this time covering with a cup of the béchamel sauce. Sprinkle this layer with half the onion-mushroom mix and the balance of the mascarpone and another cup of cheese mix. For the next layer, red sauce and the balance of the sausage and another cup of the cheese mix. For the final layer, cover with noodles, the last of your béchamel sauce and mushroom/oinion mix and the last of the cheese mix. Bake for about 45 minutes at 350 degrees. Enjoy!

Hazel

*Another WordPress blogger who is equally devoted to Trader Joe’s seasoning blends notes that Costco carries a similar product–in, of course, a much larger package. Check out Carrol’s comments in What I Crave here. I too run out of 21-Seasoning Salute all too often, so this is info I can use!

Read Full Post »
The holidays may be over, but, as singer/songwriter Robert Earl Keen observed some years ago, the party never ends. And you always need appetizers. Guests drop in, and it’s nice to have something special to serve with a glass of wine. I’m partial to palmiers, especially because I can make them when I have a free half-hour and stick them in the freezer. They’ll keep for a month, well wrapped.

I almost always have a package of puff pastry dough in my freezer (it’s a thin box and only sucks up a very small portion of that precious freezer real estate)

Choose Your Own Filling Palmiers
Roll out one square of the two in the package. If you wet your work surface with a damp sponge and cover with plastic wrap, this job is achieved with very little mess.

Rolling toward the center

I always layer my dough between two pieces of plastic wrap and roll it out so it becomes about two inches longer than it was when I started. Try to roll so the dough becomes more rectangular in shape.

Take off the top piece of plastic wrap and brush the entire flat piece of pastry with olive oil. Now here’s the fun part. Sprinkle with finely grated parmesan cheese and – you choose! I’ve used caramelized onions, olive tapenade, crumbled bacon, my honey’s smoked tomatoes minced fine, minced garlic – the variations are as big as your imagination. The only caveat: use only a couple ingredients.

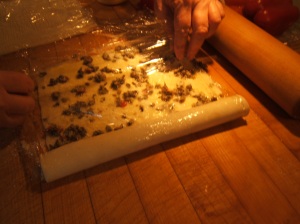
Now, starting at the left edge, start to roll your pastry toward the center. Use your plastic wrap to help in this process. Once you have reached just to the center, do the same on the right side of your pastry. Your pastry should look like two small rolls lying next to each other, and they will be about an inch tall. Wrap it with the same plastic wrap that you just used for your counter covering. Put in the refrigerator for an hour and then stash in the freezer somewhere where it will be able to keep its shape. If it’s cold from the refrigerator, it won’t form ice crystals after it hits your freezer.

When you’re ready, pull the dough out and let thaw for only 10 minutes (make sure to keep it firm) and then slice to about 1/3 inch thick pieces. Lay the slices flat on an ungreased baking sheet about a half-inch apart. If you have time, you can let them rise for about half an hour at room temp. Pop them in a 400 degree oven till golden brown and serve hot. They’re crisp, delicious and easy!

Hazel

Read Full Post »

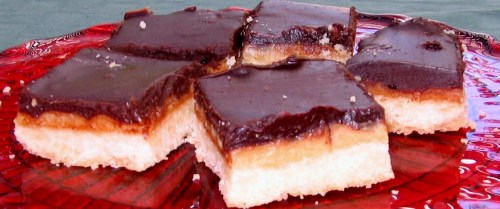
A crunchy crust, a gooey caramel layer and a ganache topping--the perfect toffee bar at last.

By Laurie A. Perry
I’ve been making toffee bars since I was nine years old–but not the same toffee bar. I’ve tried a dozen recipes by that name, and I started numbering the ones I liked enough to make twice. Toffee bar number one had coconut and brown sugar. Toffee bar number two had a brown sugar and butter crust and a topping of melted Hershey’s milk chocolate (milk chocolate–no wonder that one fell by the wayside). Number three, from an ancient Better Homes and Gardens cookie cookbook, calls for a sweetened condensed milk filling and a fudge frosting. I liked it–and Mel really liked it–but it never quite worked.

So I’ve been tinkering with the recipe, and I think the current version is pretty darn good. Try it; see what you think. I’m taking a batch to a New Year’s Day gathering. Because, you know, there just aren’t enough sweets this time of year.

GANACHE-TOPPED TOFFEE BARS

Crust
2 cups flour
1 cup melted butter
1/2 cup sugar
1/2 teaspoon salt
1 teaspoon vanilla

Filling
1 can sweetened condensed milk
2 tablespoons butter
2 teaspoons vanilla

Ganache topping
8 ounces bittersweet chocolate
1 cup cream

Heat the oven to 350 degrees. Line a 9×11-inch baking pan with foil.*
Make the crust: stir together the dry ingredients. Melt the butter; add the vanilla to the butter, and mix both into the dry ingredients. Pat the mixture into the prepared pan; it will be soft and easy to spread out. Bake for about 20 minutes, until lightly browned.
While the crust is baking, make the filling. Pour the sweetened condensed milk into a medium saucepan, add the butter and bring to a simmer. Simmer for about five minutes, stirring to keep it from burning. The mixture will thicken. Add the vanilla.

Pour the filling over the baked crust, making sure to cover all of the crust. Bake for another 20 minutes. It will bubble and turn a lovely golden brown (toffee-colored, in fact).
Remove from the oven and let cool for about half an hour. Make the ganache: break up the bittersweet chocolate and place in a heavy-bottomed saucepan; pour in the cream, and put the pan over low heat. Melt the chocolate, stirring. When the mixture is nice and smooth and glossy, it’s ready to pour gently over the first two layers. Once again, go for coverage–you want the ganache to cover the entire surface.

Chill. Remove the confection from the pan, using the overhanging foil as a handle. Cut into bars. These are rich, so don’t make the pieces too large.

*Maida Heatter’s fool-proof method for lining a pan with aluminum foil: Turn the pan upside down. Tear off a large piece of foil and press it over the pan, so you have the basic shape. Then press the foil into the pan, using a dish towel to keep the foil from tearing.

Read Full Post »

making ice cream with a Cuisinart ice cream maker

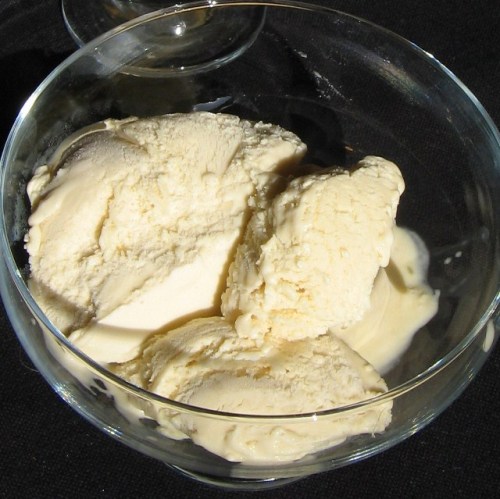
Buttermilk gives this ice cream tang and reduces the fat content--a little. After all, ice cream is supposed to be delicious, not health food.

I’ve been promising myself all summer that I’d make ice cream. I even remembered to put the Cuisinart canister in the freezer…months ago. But somehow, one thing or another prevented me from spending a happy day creating a decadent, or even semi-decadent, treat. Finally, on the first day of autumn, I got around to it. Now, I know some people have fall weather by the end of September, but it hit 95 in the San Fernando Valley, so ice cream was definitely appropriate.

Some years ago I made an ice cream with sour cream that had a lovely tanginess, and I wanted to re-create that flavor with, ideally, a little less butterfat. Low-fat buttermilk sounded like a good substitute. No one could call this a low-fat dessert, but I guess you could describe it as a reduced-fat ice cream. After all, it’s only got two cups of heavy cream, not three. The brown sugar adds to the rich flavor, I think. And I think it would be pretty damned good on a late-season-peach cobbler for my next dinner party.

Buttermilk Brown Sugar Ice Cream

2 cups of heavy cream
2/3 cup brown sugar
4 egg yolks
2 teaspoons vanilla
pinch of salt
1 cup buttermilk

Bring the cream to a low simmer in a saucepan. In a mixing bowl, whisk together the egg yolks and brown sugar with the pinch of salt. Pour a little of the hot cream into the egg mixture to temper it, then slowly pour the remaining cream in, whisking until smooth.

Mel gave me this for my birthday a few years ago. It was not entirely a self-serving gift--but nobody loves ice cream more than Mel does.

Return the mixture to the saucepan and reheat gently, stirring continuously. Do not let it come to a boil. When the custard base has thickened somewhat, remove the pan from the heat and stir in the vanilla and the buttermilk. Chill in the refrigerator for a couple of hours, then process according to your ice cream maker’s directions.

Laurie

Read Full Post »

These cupcakes are filled with a cream cheese and chocolate chip mixture. They're perfect for picnics: they're sturdy, they pack well and they have no icing to get all over everything. The only challenge? Bringing enough for all your envious seat neighbors at the Hollywood Bowl.

We love the Hollywood Bowl. We look forward to it every summer. Not only do we hear great music under the stars, as the ads say, but we have great picnics under the stars–and the helicopters and airplanes, of course. We like to grab a table on a hillside overlooking Hollywood, with a view of the Capitol Records building, open a bottle of wine and dig into the feast we have packed.

Our first concert–finally!–is Thursday. Needless to say, we’re planning our inaugural picnic supper with some care.
There are certain essentials for the first one. Later we’ll branch out, but here are the items we must have to start:

Champagne
Ripe, homegrown tomatoes
Ryan’s grilled artichokes
Black bottom cups

We’ll be writing about a number of picnic supper items, but in the certain knowledge that life is short, we’re beginning with dessert. This recipe came from Mary McGinnis years ago, and I’ve tinkered with it a bit. It comes under the category of crazy cake, meaning it’s a cake batter made without eggs.

Black Bottom Cups

Filling
16 ounces cream cheese
1 egg
2/3 cup sugar
12 ounces semisweet chocolate chips

Cake
2 1/4 cups flour
1 1/2 cups sugar
1/2 cup cocoa
1 1/2 teaspoon baking soda
1/2 teaspoon salt
1/2 cup butter, melted
1 1/2 cups buttermilk
2 teaspoons vanilla

Heat the oven to 350 degrees and fill 29 muffin cups with cupcake papers.

Beat the cream cheese until it’s soft and smooth, then beat in the egg and sugar. Stir in the chips. Set aside while you make the cake batter.

Combine the dry cake ingredients thoroughly (to distribute the baking soda throughout). Pour in the vanilla, melted butter and buttermilk. Stir until smooth.

Spoon the cake batter into the cupcake cups, filling each one about half full. Add a heaping spoonful of filling to each cup, dividing the filling among the 29 cupcakes.

Bake for about 30 minutes, until the filling is barely tinted brown.

Laurie

Read Full Post »

I am notorious for losing my wine glass at a party. I put it down somewhere so I can pick up a platter of appetizers, answer the door or take something out of the oven–and it’s gone. All too often, I pick up a glass I’m sure is mine and Hazel says, “Unh-unh–that one’s mine!”

So we started using wine charms to identify glasses. They can get pricey, however. And we like them to

Custom-made wine charms for the Queen of Hearts party.

coordinate with the theme of the party. For the Queen of Hearts party, we wanted Alice in Wonderland charms. They are not to be had, not even for ready money.

Laurel wanted to try her hand at making some. She downloaded some images and sized them to fit on tags, which she bought at Staples, and then inserted jump rings. I picked up earring hoops at Michael’s and used my needle-nosed pliers to bend back one end of each hoop, so it would stay hooked. We slipped the tags on hoops and, voila! Cute, unique and theme-coordinated wine charms. And we didn’t pay twelve bucks for eight of them, either.

You can find great photos for the step-by-step process of making your own here at Not Martha, an always interesting site.
Laurie

Read Full Post »

When my guests walk in the door, I want to greet them with a hug and a smile, great smells of the meal to come and some low-key but always memorable music. We all have different tastes: top 40, rock and roll, oldies…you name it. There’s plenty out there. In our family we love most everything (okay, we do draw our lines in the sand, but I won’t cover those here). All of my brothers play an instrument or three, as do my sisters Amie, Della and Dee.

But if your parties don’t have live music available, your MP3 player can be your best friend. I make iPod playlists, but I also have stacks and stacks of CDs, so whatever suits me the day of my party works.

When I go to a party at my sister Hellen’s, the musical gamut is run because she has lots of younger folks in her house, so you can hear a Sublime CD right after Emmy Lou Harris, Tom Petty following Lyle Lovette or Robert Plant’s newest–all super choices, although they can get loud. My brother Sonny will get you anything from Motown to George Jones to Lightnin’ Hopkins. Della has introduced me to some super music, so you never know what you’ll get at her house, but you can bet it will be good.

Laurie leans toward classic Ella Fitzgerald but is always sensitive to her guests and the style of the party. Me? I’m fairly eclectic in my musical tastes, but for a party, I’m pretty stuck on my background music choices. If it’s my annual Wisteria Tea, I usually have Stephan Grapelli and Django Rheinhardt playing. If it’s a dinner party, you can often hear a mix of Grapelli & Rheinhardt, Charlie Bird, Eartha Kitt and Billy Holiday.

So instead of a recipe today, I’m giving you some jazz essentials for a dinner party. Music that is timeless and almost everyone enjoys; even your teens can find some redeeming qualities in it (OK, maybe it’s only my teen friends; I must admit to being thrilled when my 12-year-old niece Liv asked for a copy of an Eartha Kitt CD).

Great music for a dinner party.


So here we go:

Eartha Kitt – Miss Kitt to You or the Legendary Eartha Kitt
Billy Holiday – Jazz ‘Round Midnight (but there are plenty more!)
Charlie Byrd Quintet – Du Hot Club de Concorde
Miles Davis — Kind of Blue
Dave Brubeck – Time Out
Ella Fitzgerald – Dream Dancing is my favorite but you can’t go wrong with the Cole Porter Songbook or the Gershwin Songbook, but, really, the list of great Ella recordings is endless!
Django Reindhardt — Djangology
Nor can you go wrong with Great Ladies of Jazz and Great Ladies Sing the Blues, both compilation albums, and every song on them is a winner. These picks are all timeless and fun and most everyone will enjoy them.

Add to it with a few modern(ish) albums. I love Cover Girl by Shawn Colvin, Marc Cohn’s Walking in Memphis, Rosanne Cash’s Somewhere in the Stars and The Mavericks Music for All Occasions.

You can mix up your music, as I did for a Bunco Night fundraiser for 100 with a five-hour playlist to please every age, or you can tailor it to your smaller group. It is lots of fun making playlists but a lot harder to make a compilation that pleases everyone.

Hazel

Read Full Post »

Laurie and I have a theory that every good party starts in the kitchen. And in our family, most of them also migrate there during the course of an evening. Laurie has a great kitchen in that it’s open to the living room, with a breakfast bar between the two spaces. She always sets up her appetizers and drinks on the bar, so she can converse with her guests while putting the finishing touches on her meals. Her guests keep her company and usually help out–win-win! The same goes for my sister-in-law Vicki’s fabulous mountain kitchen. Mine’s a bit quirkier, more like a train station, but I like it.

Our Aunt Mary’s kitchen is a different story. It’s probably twice the size of our kitchens, but it still gets pretty crowded. We always try to have appetizers of some sort ready for guests as they arrive, but the day of our tea was drizzly and cool, so we all had champagne in the kitchen while everyone chatted, listened to music and kicked in to help make our afternoon tea.

While our hostess sat with her injured ankle wrapped in ice and propped up on a stool, Maddie assembled the trifle and Allisande made tea. Laurie and I made sandwiches, which was pretty easy, since we’d really done all the prep work in our own kitchens, where we were able to commune with our own food processors and favorite knives. Don’t get me wrong, Mary has all the right stuff–we just can’t find it in her enormous 1920s-era kitchen!

Barb artfully arranged fresh fruit on a crystal dish that she had foraged for in Mary’s butler’s pantry. (She forswears other desserts. Such virtue!) One of the fun things about Mary’s house is that her butler’s pantry is chock-full of antique serving dishes passed on by her and Phil’s moms and aunts. Dee and Ryan arrived late because they had to work late, so they missed out on the fun in the kitchen. But with everyone helping, we pulled together sandwiches for 10 in record-breaking time.

Let’s eat!

Hazel

Read Full Post »

First things first: Have something ready to hand your guests as they walk into the room. A cup of coffee, a festive mimosa…maybe a bite of something in case someone has been out for a 15-mile run before coming over. (Yes, I do have friends who do that.
Especially if they’re preparing for a marathon—or they have an idea that today’s menu will be caloric. And I’m here to tell you, this is not diet food!) We picked up some mini quiches at Costco to heat and serve. While we were there, we also bought a dozen croissants for the filled French toast. And, oh yeah, a tub of soft cream cheese. It’s true, Costco is the land of giants, but, boy, is it a great resource when you’re planning to feed a crowd.

The nice thing about this menu is that most of it can be prepared before your guests arrive, even the bacon (which we bake).

Mimosas, coffee or orange juice
Mini quiche appetizers

Essential Ingredients

Filled French Toast

Start by assembling the French toast:

8 croissants
2 cups softened cream cheese
1 1/2 cups cherry preserves

8 eggs
2 ½ cups milk
1 ½ teaspoons vanilla
1 teaspoon cinnamon
4 tablespoons sugar

Split the croissants. Spread each one with about a quarter cup of soft cream cheese; top with about three tablespoons of cherry preserves. (But if you prefer strawberry or raspberry preserves, go for it.) Press the halves together again. Place the croissants close together, so they are touching, in an 11×15-inch baking dish. (If you don’t have a baking dish that big, use two 8×8 square ones. Just be sure the croissants are packed together closely.)

Lightly beat the eggs, then stir in the sugar, vanilla, cinnamon and milk. Pour over the croissants. At this point you can put the pan in the fridge for an hour, until the last of your guests escape the freeway and arrive, hungry and cranky. Heat the oven to 350 degrees. Give everybody a mimosa or coffee and then put the croissants in the oven to bake for about 30 minutes, until the egg stuff is cooked through. Pass syrup and powdered sugar for those who like their French toast nice and sweet.

We made a cinnamon-flavored syrup to pick up on the cinnamon in the French toast:
1 cup water
2 cups sugar
two cinnamon sticks

Bring the water and sugar to a boil, stir until the sugar dissolves. Add the cinnamon sticks and simmer for about five minutes. You can make this earlier and set it aside to steep. Rewarm and remove the cinnamon sticks when you’re ready to serve.

You don’t want to make syrup? Pick up something that looks yummy, maybe a berry-flavored syrup.

Read Full Post »

Older Posts »