Feeds:
Posts
Comments

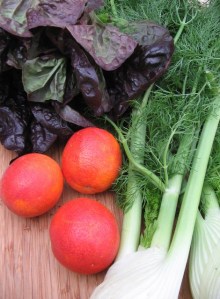
I’m a tomato snob. If it’s not home-grown, I won’t eat it. That means March is kind of a tough month–I crave tomatoes; I crave gorgeous summer salads with ripe, juicy tomatoes and that perfect acid-sweet balance that a great tomato provides. So in pursuit of a sweet and tangy substitute for perfect summer tomatoes–and maybe a little gory color too–I rummaged through my local farmers market this morning and came home with blood oranges, fennel and avocados. Oh, and some pretty red leaf lettuce too.

Blood oranges for tang and color, fennel for sweetness and crunch make a satisfying late-winter salad.

Blood oranges for tang and color, fennel for sweetness and crunch–together they make a satisfying late-winter salad.

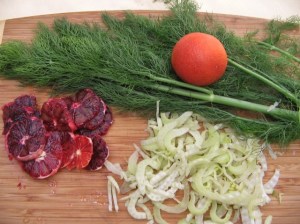
One of the growers had Moro oranges, the darkest red of all blood oranges; they were small and fragrant. I peeled and sliced two of them and juiced a third one, slivered a bulb of fennel (just the white part), and peeled and sliced a nice ripe Haas avocado. I thought it needed a fairly delicate dressing, and luckily I remembered that someone had given me a bottle of Vilux hazelnut oil as a hostess gift in December. It’s a lovely, buttery oil, delicate and delicious, so I made a simple vinaigrette.

Slivered fennel and Moro blood oranges

Slivered fennel and Moro blood oranges

Hazelnut and Citrus Dressing
1/2 cup hazelnut oil
1/4 cup citrus juice (I used the juice of one Moro orange and 1 Bearss lime)
Salt and pepper to taste

Whisk together, taste and adjust the seasoning. If you like a sharper dressing, add a little more lime juice. Wash the lettuce and tear it into bite-size pieces. Spread the lettuce on a platter, then alternate slices of oranges and slices of avocado atop it, sprinkle the fennel slivers over all and drizzle the dressing over it. The result is pretty and inviting–and yummy.

It’s not ripe ‘Japanese Black Trifele’ tomatoes fresh from the garden, but it’s a darned good salad.

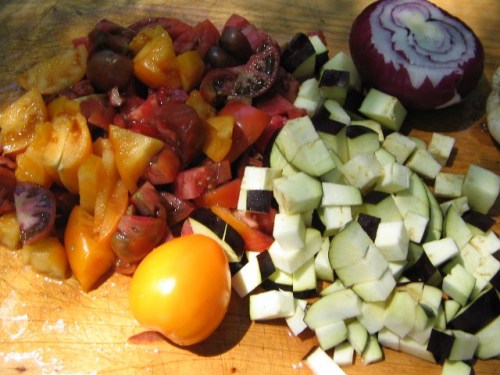
Garden tomatoes, eggplant and onions are the basis for caponata, a great summertime vegetable dish.

Anna’s Italian Ristorante made the best caponata I’ve ever had. Anna’s was an old-fashioned red-checked-tablecloth Italian place on L.A.’s Westside; it was the kind of place where the owners knew all of their regulars’ names and the waiters were all professional waiters rather than aspiring actors and screenwriters (they also knew many secrets, and occasionally they told stories–naming no names, of course!). Tony and Andy decided to retire a couple of years ago, so they sold the property. Now it’s just another would-be trendy bar.
Tony promised to share the recipe for caponata before they closed their doors–but he never did.
I’ve been experimenting for years now, attempting to duplicate it. Here’s what I’ve come up with. It’s not identical, but it’s pretty darned good.

Caponata

1/2 cup olive oil
4 cups chopped onions
4 cups diced celery
8 cups diced eggplant
1 large ripe bell pepper (red, yellow or orange–not green)
4-6 large cloves of garlic, minced
1 15-oz. can plum tomatoes
1 small can tomato paste
1 15-oz. can black olives (roughly chopped)
1/4 cup balsamic vinegar
3 tablespoons brown sugar
2-3 tablespoons each minced oregano, thyme and basil
1-2 tablespoons minced rosemary
1 bay leaf
1/4 teaspoon Tabasco or red pepper flakes
salt to taste

Heat a few tablespoons of the olive oil in a large dutch oven. Saute the onions and celery until translucent, then add the garlic and saute for another minute or so. Remove those vegetables, and saute the bell pepper for about five minutes. Add the bell pepper to the celery onion mixture. Heat the remaining olive oil and saute the eggplant until it is about half done, then toss all of the vegetables together, along with the remaining ingredients. Stir it all together, cover it tightly and simmer it for an hour or two, stirring regularly. The whole glorious mess should coalesce into a thick, unctuous, chunky goo. Taste it and adjust the seasonings–you want a nice sweet-and-sour balance. (Tony swore that Anna’s caponata had no sugar in it. Do I believe him? Well…maybe.)
Chill it overnight and serve it with crusty bread–or anything else that sounds good to you. This is a big recipe; it makes a lot and it keeps for days, just getting better.

It lends itself to lots of variations. During tomato season (now–at last!), I generally use fresh tomatoes and eggplant out of the garden, along with whatever herbs I happen to gather. You can chop up zucchini and throw it in too. Caponata is very forgiving.

Image

Our friend Tony Chong contributes this article. Tony mans a mean barbecue and makes a curry so hot, grown men weep and his wife flees the kitchen–and his famous cucumber salad is delicious with both options.   

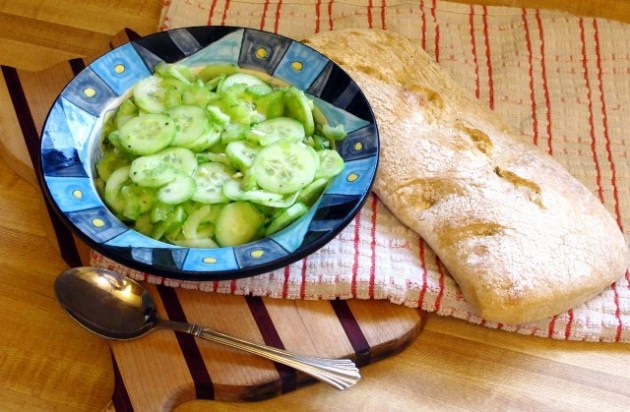
I was never much of a cucumber fan growing up, so it is rather ironic that a salad based on cucumbers should become one of the most well-received and requested dishes I’ve ever made. But what’s not to like? The combination of tang and sweet with a touch of savory, mixed with the zesty crunch of the cucumbers, makes it a wonderfully light and refreshing counterpoint to just about any main course you can imagine.


Interestingly enough, a cucumber salad was not what I intended to make when I started out. I was originally trying to create a good tomato, red onion and cucumber salad, emphasis on the tomatoes and onions. While the various results were satisfactory, they never quite hit the full mark. The onions proved too strong for some people and the tomatoes tended to disappoint both in flavor and in texture. It quickly became clear that the one element that held up throughout all the variations were the cucumbers.  So why not just do a good-parts version?


Inspiration was drawn from the marinated cucumbers adorning the house salad at Clancy’s Crab Broiler seafood restaurant inGlendale,CA. Of all the cucumbers I had tasted, those were the best. With that in mind, the quest was on to find the perfect combination of supplements for the featured ingredient. It took several tries, but the final results proved not only delicious, but allowed the cucumber to become the central feature of the dish, not a mere ornament to a standard lettuce-based salad.


While regular cucumbers will work, the salad is best made with extra-crispy Persians, which are the long, skinny, thin-skinned variant that show up in some local farmers markets.  Happily Trader Joe’s carries them as well. The wrapped English hot-house cucumbers will work fine, too, but it is really the Persians you want.


With that said, the ingredients are:


  • 4 cloves garlic, minced fine
  • 3 stalks celery, chopped fine
  • 12 small cucumbers, peeled and sliced thin
  • 10-12 oz of seasoned rice vinegar (although garlic or plain will work fine) – enough to cover
  • A dash or two or Lawry’s Savor Salt
  • ¼ teaspoon dried oregano
  • Sugar to taste (more than you would think, but just this side of pucker)


Mix garlic, celery and cucumbers in a large serving bowl. Add Savor Salt, vinegar and oregano and stir. Add sugar slowly and taste; stop when you no longer pucker up! There should be just enough vinegar to cover cucumbers when they are pressed down (will create additional fluid as they marinate).  Let stand in the refrigerator for at least a couple of hours. Serve chilled. Salad will last up to a week in the refrigerator in a sealed container.


And there you go; a little taste of spring that can be had year-round – at least in places that carry all the ingredients.  By the way, they also make great cucumber tea sandwiches!


For this and other fun recipes, including some by regular host Laurie Perry, buy the Invenature Eats cookbook at: http://www.lulu.com/shop/tina-chong-and-and-friends/invenature-eats/paperback/product-6538060.html  Available in both spiral-bound and electronic versions.

–Tony Chong

quick and easy chocolate dessert

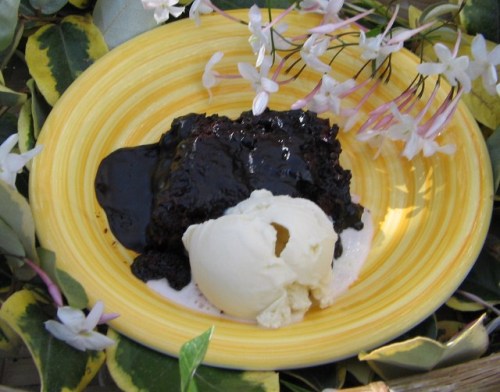
Mom called it Fudge Crud--but it's delicious and festive enough for any dinner party.

When I was a kid, my mother made an easy, inexpensive dessert that was officially known as Hot Fudge Sundae Cake; Mom called it Fudge Crud. It was one of those science-experiment desserts: you made a cake batter (one without eggs), spread it on the bottom of the pan, then topped it with a mixture of cocoa and brown sugar and poured hot water over the whole thing.

And, miraculously, as the cake baked, the water and cocoa thickened into a sauce and the cake rose to the top, becoming a sort of chocolate floating island in a sea of fudge sauce. It never failed to amaze me–as they say, science works even if you don’t believe in it. There was just one little problem: It wasn’t chocolate-y enough. So this winter, when chilly nights made me think fondly of warm gooey desserts, I remembered Fudge Crud.

And I decided to tinker with the amounts of cocoa until it was chocolate-y enough. When I made the most recent version for friends last week, they declared that I had achieved my goal.

Hot Fudge Sundae Cake

Cake
1 cup flour
3/4 cup granulated sugar
4 tablespoons cocoa (good cocoa – I use Valrhona)
2 teaspoons baking powder
1/2 teaspoon salt
1/2 cup milk or water
2 tablespoons vegetable oil
1 teaspoon vanilla
1 cup chopped walnuts or pecans

Sauce
1 cup packed brown sugar
1/2 cup cocoa
1 3/4 cups hot water

Heat the oven to 350 degrees. Mix together the first five ingredients, then stir in the milk or water, the oil and the vanilla. Stir until smooth, then mix in the nuts. Spread the batter in a baking pan.

Yes. Now, about that baking pan. The original recipe claims that you can make this dessert in a 9x9x2 square pan. And you can–but you will have chocolate goo all over the bottom of your oven if you do. I use a lovely 9x10x3 Le Crueset baking dish I received as a gift a few years ago. It’s perfect. If your friends don’t know you well enough to give you lovely deep baking dishes, try a 9×11 pan.

Anyway, you spread the batter in the pan. Mix together the half-cup of cocoa and the brown sugar and sprinkle it over the batter, then slowly pour the hot water over all. Bake for 40 minutes, until the cake floats to the top and firms up.

Spoon the warm cake into dessert bowls, making sure everybody gets plenty of sauce, then top with ice cream. Yum.

Laurie

I make lasagna for parties and potlucks; I often make it for the first night of our annual girlfriends four-day Cambria road trip, but I’m fairly sure my honey has never had it for a dinner with just the two of us. Mostly because, in true Perry fashion, I only know how to make a batch for 10 or more guests. I’m sure you can make smaller amounts, but why? The leftovers are even better for lunch or dinner the next day and the rest freezes perfectly for that night you are just too exhausted to prepare dinner. So here you go – dinner for 10 – just add salad and garlic bread.
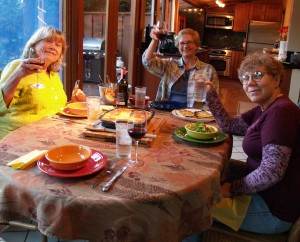
Good friends, a bottle of red & Red & White Lasagna


This lasagna uses both a red sauce and a faux bechamel/white sauce–it’s not a true bechamel because I don’t adorn an onion with whole cloves and steep it in hot milk for an hour. (That makes for a delicious sauce, yes, but I have a day job. And a life.)

Easy Red Sauce

1/2 small onion, chopped
1-2 tbls olive oil
4 large garlic cloves, minced
2 lg cans Italian stewed tomatoes (try to find Italian, they’re better!)
1/2 cup red wine (good wine, follow my mantra – if you can’t drink it, don’t cook with it)
1 small can tomato paste
2 tsp Trader Joe’s 21-Seasoning Salute*
2 tsp Trader Joe’s Pasta Seasoning Blend
Salt and pepper to taste

Heat the olive oil in a large skillet; warm the olive oil (you want medium heat–olive oil burns if your heat is too high), then add onions and sauté until tender (about 3 minutes). Pour in the tomatoes and smash them until they’re in smaller chunks. Add tomato paste, spices and red wine. Simmer with a screen cover (so it doesn’t splatter all over your stove) for about half an hour. Salt and pepper to taste.

Easy White Sauce

1/4 cup butter (half a stick)
1/3 cup flour
1 qt half and half
1 tbls Knorr Caldo de Pollo powder
1/4 cup white wine
1 1/2 teaspoons nutmeg (or to taste; sometimes I use more)

Melt butter in large saucepan until bubbly. Add flour and stir in; the flour should be absorbed. Stir for about 3 minutes; don’t allow to turn brown! Add wine and then the milk until the mixture is thick and starts to bubble (it might not take the full quart). Then add in the pollo de caldo powder. Last, turn off heat and stir in nutmeg.

Hazel’s Red-and-White Lasagna

Ingredients:
Red and white sauces (purchased red is ok if you have a favorite, although I prefer my own)
1 package of Trader Joe’s Quattro Formagio cheese mix
1 8-ounce package of sliced white mushrooms
1 small onion, halved and thin sliced
1 package TJ’s Italian sausage (Chicken)
Olive oil
1 package no-boil lasagna noodles
1 tub Ricotta

Bring a large sauté pan to heat and splash in a couple tablespoons olive oil. Squeeze the chicken sausage from its casings and crumble into the pan. Sauté til cooked through, crumbling into big chunks. Remove from pan and add the sliced onions and mushrooms. Sauté til golden, then remove from heat.

In a large deep lasagna baking pan splash the bottom with olive oil, and smear over the bottom and sides of pan. Ladle in approx 1 cup of your red sauce and add the first layer of dry, uncooked lasagna noodles. Add another cup of red sauce to the top and spread roughly with flat wooden spoon. Sprinkle half your sausage over that layer. Add half the mascarpone by teaspoonfuls across this layer and then add about a cup of the cheese mix. Add another layer of noodles, this time covering with a cup of the béchamel sauce. Sprinkle this layer with half the onion-mushroom mix and the balance of the mascarpone and another cup of cheese mix. For the next layer, red sauce and the balance of the sausage and another cup of the cheese mix. For the final layer, cover with noodles, the last of your béchamel sauce and mushroom/oinion mix and the last of the cheese mix. Bake for about 45 minutes at 350 degrees. Enjoy!

Hazel

*Another WordPress blogger who is equally devoted to Trader Joe’s seasoning blends notes that Costco carries a similar product–in, of course, a much larger package. Check out Carrol’s comments in What I Crave here. I too run out of 21-Seasoning Salute all too often, so this is info I can use!
A delicious low-cal dinner in minutes!

Lulakabob! What is it really? you ask. If you’re of Armenian descent, you already know; for the rest of us, it’s a happy discovery.
My first experience with lulakabob was at a barbecue – of a sort. It was at a automobile-salvage yard in the middle of a winter afternoon just before Christmas several years ago; it was cold, muddy and windy. One of the yard guys laid a grill over a big hub cap full of hot coals and then grabbed a skewer and squeezed some kind of ground meat onto it and laid it on the grill. He kept transferring meat to skewers as a bottle of Grey Goose and a bottle of Black Label were passed around and plastic cups were filled. Ice and mixer were offered, but with a look that told me only sissies would use them. A heavenly aroma rose from the grill, and when I was handed a skewer hot off the fire, I found out why.

I’ve been a lulakabob fan ever since.

They’re so simple and delicious. I recommend them as an appetizer for parties, although my honey and I have them for dinner too. You can make them on the small wooden skewers you find at the market, but I recommend going to the cooking store of your choice and picking up flat metals ones because they do work much better. I’ve found them at barbecue-supply stores for lots of money, but I’ve also seen them at the 99 Cent Store. Needless to say the chi-chi ones are of better quality, but if you’re in a hurry or on a tight budget, go the cheap route!

As you may have deduced, lulakabob isn’t from these parts, so the hardest part of this recipe can be finding a Middle Eastern market that carries the essential ingredient. If you’re in Glendale, there are lots of them, including my favorite Central Grand Market on N. Central. I have discovered a new favorite out here in the Inland Empire called simply the Farmers Market on Foothill and Archibald in Rancho Cucamonga. It’s a great store with a fabulous stock of exotic foods and a fresh meat market at the back, stocking lulakabob already mixed; you can buy ground, spiced lamb, chicken or beef. Feel free to buy cucumber dip or tzatziki while you’re there and if you find a great market like the two just mentioned, you’ll be able to pick up fresh baked flat bread to accompany your lulakabob.

You can also buy a package of dried lulakabob spices with the directions to make any ground meat into lulakabob. I always have a couple packages on hand.

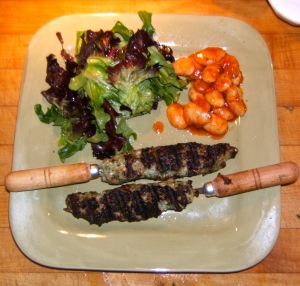
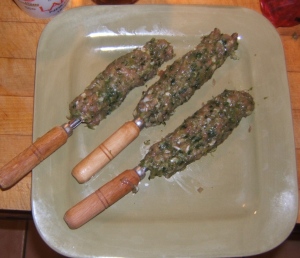
Uncooked Chicken Lulakabob

Take it home, open up your white butcher paper and let the kabob building begin. It’s easy; wash your hands well, scoop out a handful of ground meat and squeeze on to your skewer – it’s that easy. Make as many skewers as you think you need, and then add a couple more. Place them on a hot grill and turn them every two minutes; they only need about 7 minutes altogether. It’s a quick, yummy dinner – serve with a fresh salad, flat bread and a yogurt dip of your choice. That’s it — a perfect, lo-cal, low-fat dinner. Make them in smaller bite-size skewers for appetizers. They’ll go over great at any Super Bowl party, I promise!

Hazel

The holidays may be over, but, as singer/songwriter Robert Earl Keen observed some years ago, the party never ends. And you always need appetizers. Guests drop in, and it’s nice to have something special to serve with a glass of wine. I’m partial to palmiers, especially because I can make them when I have a free half-hour and stick them in the freezer. They’ll keep for a month, well wrapped.

I almost always have a package of puff pastry dough in my freezer (it’s a thin box and only sucks up a very small portion of that precious freezer real estate)

Choose Your Own Filling Palmiers
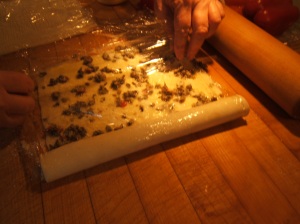
Roll out one square of the two in the package. If you wet your work surface with a damp sponge and cover with plastic wrap, this job is achieved with very little mess.

Rolling toward the center

I always layer my dough between two pieces of plastic wrap and roll it out so it becomes about two inches longer than it was when I started. Try to roll so the dough becomes more rectangular in shape.

Take off the top piece of plastic wrap and brush the entire flat piece of pastry with olive oil. Now here’s the fun part. Sprinkle with finely grated parmesan cheese and – you choose! I’ve used caramelized onions, olive tapenade, crumbled bacon, my honey’s smoked tomatoes minced fine, minced garlic – the variations are as big as your imagination. The only caveat: use only a couple ingredients.

Now, starting at the left edge, start to roll your pastry toward the center. Use your plastic wrap to help in this process. Once you have reached just to the center, do the same on the right side of your pastry. Your pastry should look like two small rolls lying next to each other, and they will be about an inch tall. Wrap it with the same plastic wrap that you just used for your counter covering. Put in the refrigerator for an hour and then stash in the freezer somewhere where it will be able to keep its shape. If it’s cold from the refrigerator, it won’t form ice crystals after it hits your freezer.

When you’re ready, pull the dough out and let thaw for only 10 minutes (make sure to keep it firm) and then slice to about 1/3 inch thick pieces. Lay the slices flat on an ungreased baking sheet about a half-inch apart. If you have time, you can let them rise for about half an hour at room temp. Pop them in a 400 degree oven till golden brown and serve hot. They’re crisp, delicious and easy!

Hazel

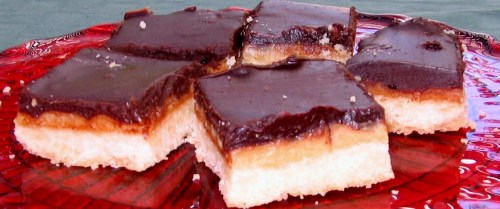
A crunchy crust, a gooey caramel layer and a ganache topping--the perfect toffee bar at last.

By Laurie A. Perry
I’ve been making toffee bars since I was nine years old–but not the same toffee bar. I’ve tried a dozen recipes by that name, and I started numbering the ones I liked enough to make twice. Toffee bar number one had coconut and brown sugar. Toffee bar number two had a brown sugar and butter crust and a topping of melted Hershey’s milk chocolate (milk chocolate–no wonder that one fell by the wayside). Number three, from an ancient Better Homes and Gardens cookie cookbook, calls for a sweetened condensed milk filling and a fudge frosting. I liked it–and Mel really liked it–but it never quite worked.

So I’ve been tinkering with the recipe, and I think the current version is pretty darn good. Try it; see what you think. I’m taking a batch to a New Year’s Day gathering. Because, you know, there just aren’t enough sweets this time of year.

GANACHE-TOPPED TOFFEE BARS

Crust
2 cups flour
1 cup melted butter
1/2 cup sugar
1/2 teaspoon salt
1 teaspoon vanilla

Filling
1 can sweetened condensed milk
2 tablespoons butter
2 teaspoons vanilla

Ganache topping
8 ounces bittersweet chocolate
1 cup cream

Heat the oven to 350 degrees. Line a 9×11-inch baking pan with foil.*
Make the crust: stir together the dry ingredients. Melt the butter; add the vanilla to the butter, and mix both into the dry ingredients. Pat the mixture into the prepared pan; it will be soft and easy to spread out. Bake for about 20 minutes, until lightly browned.
While the crust is baking, make the filling. Pour the sweetened condensed milk into a medium saucepan, add the butter and bring to a simmer. Simmer for about five minutes, stirring to keep it from burning. The mixture will thicken. Add the vanilla.

Pour the filling over the baked crust, making sure to cover all of the crust. Bake for another 20 minutes. It will bubble and turn a lovely golden brown (toffee-colored, in fact).
Remove from the oven and let cool for about half an hour. Make the ganache: break up the bittersweet chocolate and place in a heavy-bottomed saucepan; pour in the cream, and put the pan over low heat. Melt the chocolate, stirring. When the mixture is nice and smooth and glossy, it’s ready to pour gently over the first two layers. Once again, go for coverage–you want the ganache to cover the entire surface.

Chill. Remove the confection from the pan, using the overhanging foil as a handle. Cut into bars. These are rich, so don’t make the pieces too large.

*Maida Heatter’s fool-proof method for lining a pan with aluminum foil: Turn the pan upside down. Tear off a large piece of foil and press it over the pan, so you have the basic shape. Then press the foil into the pan, using a dish towel to keep the foil from tearing.

Today we have a guest post from our nephew Ryan Moore, who came up with this yummy quinoa dish. It’s a nice change from all of the rich foods of the winter holidays, and it’s very pretty too.

By Ryan Moore
Quinoa is a wonderful, soft, light, fluffy, grainlike seed that can easily be tossed into salads or serve as a replacement for other grains. It’s so easy to prepare too. My mother, in her explorations of healthy gluten-free alternatives to wheat, introduced me to quinoa, and it quickly became a favorite.

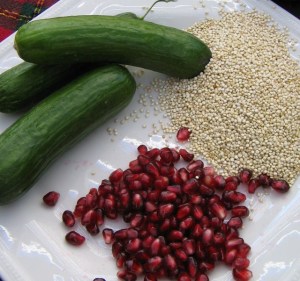
The ingredients for a simple, delicious and healthy salad.


I started out thinking I would create something like tabouleh with it, but the homogeneous nature of traditional tabouleh doesn’t suit fluffy quinoa, so I broke it into two parts: the warm nutty quinoa and a delicious seasonal mixture of pomegranate and cucumber. I liked that combination a lot, but I thought it needed something just a little richer and sweeter than the traditional olive oil and lemon juice as a dressing, so I came up with a yogurt-honey dressing.

Quinoa Cucumber-Pomegranate Salad

Quinoa:
•1 cup dry quinoa
•1tbs butter or ghee
•1/2tsp ground cumin (whole Cumin can also be used)
•2 pods black cardamom, ground
•1 clove garlic, pressed
•2 cups water
•Salt to taste

Pomegranate-Cucumber salad:
•1 pomegranate
•½ English cucumber, or 2-3 Persian cucumbers, diced
•½ red onion, quartered and finely sliced
•flat leaf parsley, finely chopped
•1 clove garlic, minced (optional)
•juice from 1 lemon, plus some of the lemon zest
•1-2 tablespoons olive oil
Salt to taste

Yogurt-Honey dressing:
•Greek yogurt
•Mint, chiffonade or finely chop
•Honey to taste

Preparation: Heat butter/ghee (I like to use ghee because it tolerates high) in a pot over medium to medium-high heat. Add the cardamom, cumin and salt. Stir or swirl that together; it should become fragrant almost immediately–just make sure it doesn’t burn. Add the pressed garlic and when you can smell the garlic, pour in the dry quinoa. Stir that around for 30-60 seconds. Add water, cover, bring to a boil and then simmer until done.
While the quinoa is cooking, mix together the yogurt, mint and honey; set aside. You’ll notice there are no amounts given–that’s because your taste buds must be the guideline. Start with a cup of yogurt and a dollop of honey, plus a tablespoon of mint chiffonade. Add more of any single ingredient until you have a flavor you love.
Separate out the pomegranate kernels. If you’ve never done this before, it’s easiest to completely submerge the pomegranate in water, split or cut it in half, and then liberate the kernels (yes, I do mean liberate; they are delicate). The pith will float to the surface and the kernels will fall to the bottom. Combine the pomegranate kernels and the remaining ingredients in a bowl and toss them together gently.
As far as presentation goes, the only important guideline is the separation of the three components. For single servings, simply place a serving spoon’s worth of quinoa into a bowl or onto a plate, top with a generous dollop of mint yogurt and top with the pomegranate-cucumber mixture.
These great colors and flavors make a fabulous presentation
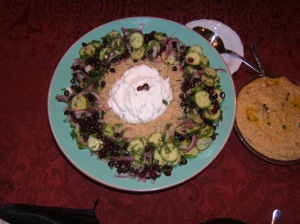
Hazel served it at her holiday party in a large shallow bowl, mounding the quinoa in the bowl and then creating a well in the center for the yogurt sauce, with a festive wreath of the pomegranate-cucumber salad circling it.

I never thought this day would come, but somehow it has. Many of my sisters have grandkids. There’s a reason I bring this up. In the past, my house was Thanksgiving central. My sisters who lived in town would come; my aunt would come and my mom would be there.

Before I knew it, I’d have 35 for dinner.

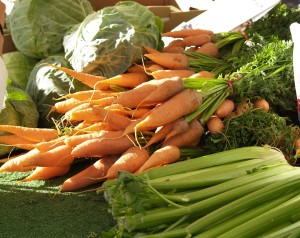
Colorful vegetables dress up any party platter


Everyone contributed. We got my aunt Mary’s wonderful broccoli casserole, my sis-in-law Vicki’s sweet potatoes – well, you get my drift – a feast! When the dining room table was fully loaded, we would announce dinner and the line would form. Laurie and I usually collapsed and let it; we were rarely hungry after the hours of cooking. Everyone would find a place to sit with their plates perched in their laps, a glass of wine resting precariously wherever they could find room, we’d eat, chat, help with the dishes and depart. Usually leaving me with a table still laden with food. I’ve gotten smarter over the years. I encourage everyone to take leftovers. That way I’m not stuck with the duty of “not throwing away perfectly good food.”

But this year, it’s happened; my sisters are preparing their own Thanksgiving dinners with their own new traditions for their grandchildren to remember. Their own recipes to pass down and teach. Their own tables to design and fancy plates to wash. Thus we find ourselves with a very rare occurrence – a sit-down Thanksgiving dinner at my house. Dinner for eight. Wahoo!

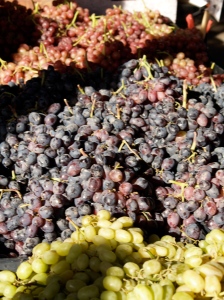
Let in-season locally grown fruit be part of your appetizer platter

Normally, we expect our guests to arrive anywhere from noon to six, so we make sure there are appetizers out all day. This year, Laurie and I are whittling down our enormous repertoire of hors d’oeuvres to accommodate our six guests. We usually worry about how to keep starvation at bay while other guests are still driving from fifty miles away. (Something of a challenge, let me tell you: We would tell everyone that dinner was at six, my brother and his wife and brood would arrive at 6:30 with their side dish that needed an hour in the oven, and my brother would tap his foot, asking sarcastically when dinner would be ready. “You said six!”) This year – nope! We’re wondering which few appetizers will appeal the most and which will be expected and missed if we don’t trot them out. How fun is this!

So to kick off the holiday season, we’re giving you our appetizers. You can get the main Thanksgiving dinner from every cooking show on TV, you don’t need us to give you hints. Although, let’s face it: it’s me and Laurie – it’s what we do!

There’s one appetizer that we absolutely insist on. It was published years ago in Bon Appetit. Here’s the link to Black Pepper Almonds. Sometimes these never make it out of the kitchen–cooks get first crack at them.

Hazel